Thermal Insulation
1m x 5m SIFelt™ 20mm 400gsm Polyester Non-woven Charcoal Sound & Thermal Insulation
£23.59
Thermal Insulation
1m x 1m SIFelt™ 20mm 400gsm Polyester Non-woven Charcoal Sound & Thermal Insulation
£8.99
Thermal Insulation
1m x 1m SIFelt™ 30mm 600gsm Polyester Non-woven Charcoal Sound & Thermal Insulation
£10.00
Insulation Blog

Camper Van Conversion Insulation to Camper Van Full Guide - By Sound Insulations Ltd - Your Insulation Supplier
Wednesday, February 26, 2025 - 0 Comments
Posted by Sound Insulations Ltd
Van Conversion to Camper Van Full Guide - By Sound Insulations Ltd - Your Insulation Supplier
We recently assisted in the insulation whilst converting a van to a camper van. We documented the process for your interest.
If you are interested in finding a full guide for insulating a van whilst converting it to a campervan, you have found the right place online.
Let the full van insulation guide begin.

First we needed to strip the van down and clean all panels to assist with the adhesive properties of the insulation products we chose!

Then we started to measure up the size of ButylMAT panels we would need to ensure the panel resonance is reduced considerably.

We settled on 2 sizes as we used the ButylMAT on rolls to ensure maximum efficiency. (200mm x 150mm and 150mm x 150mm)
The benefits of the ButylMAT over competitor products is that it is manufactured in the UK and offers excellent acoustic and thermal properties, as well as coming with a UV resistant cover film and does not cut you whilst fitting it.

We placed the ButylMAT van sound deadening insulation 2 pieces to most panels as shown below:

Until the van was complete with the sound deadening installation for the roof.
Next, we moved on to the roof insulation material.
We chose the SIOPCELL class 0 foam insulation material as it has great acoustic properties as well as excellent thermal insulation characteristics and fits nicely in the recesses of the vans bodywork.

We used the 19mm variation of this product with the self adhesive backing as it would also leave an air gap between the insulation and the surface panels.

We had already cleaned the panels off prior to fitment.
We measured the panel sizes and cut these on a cutting board ensuring we utilised the material for maximum efficiency.
Then we simply lined up one edge and peeled the backing off half the panel of SIOPCELL class 0 insulation foam.
Applying pressure as we fitted the panel.

Half fitted and applying pressure once we followed one edge of the recess for fitment.
Until.......

That is the roof sound deadening and insulation applied.
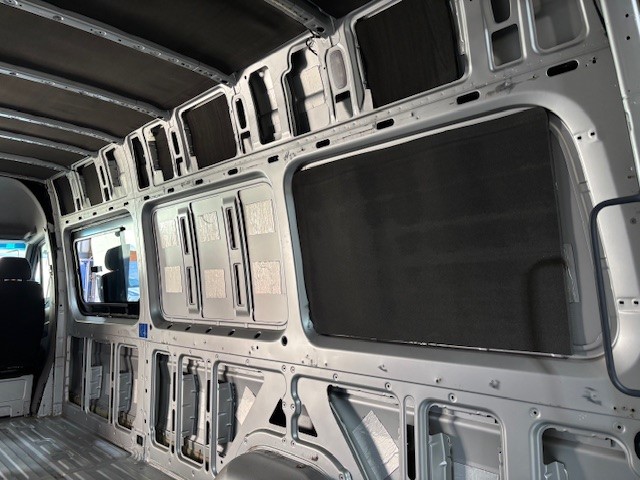
We then continued to insulate the van upper side panels with the SIOPCELL foam insulation

Carefully ensuring adhesion of the van insulation material we applied pressure once the product was in the right place on the van panel.

Then we chose a PVC Nitrile Class 0 Waterproof insulation to insulate the lower panels of the van

We chose the self adhesive backing to ensure a great bond of the van insulation to the lower panels of the van and chose this product as it both blocks out noise and absorbs noise.

We measured the lower van panels prior to cutting the PVC Nitrile Van insulation.

We applied pressure to the van insulation material once the product was in the right place. This ensures an excellent bond between the van body and the insulation itself.
Until we had completed the installation of van insulation upper half of the van......


Next was to replicate what installation of insulation was done on the van side panels to the doors.

Then we replicated the lower half of the van door with the same PVC Nitrile Class 0 Foam Insulation used on the lower side panels of the van.

After this was complete we took a break and developed the insulation for the van floor. It was important to ensure this van no longer behaves like a van so we therefore used our DeciLAM product on top of a 10mm PE Foam so as to not decrease headroom within the camper van conversion too much. The combination of these two products will offer great acoustic performance as well as excellent thermal protection.
First, we measure the infilled groves of the van to ensure a fairly flat surface was available for the van floor insulation.

We then cut strips and used contact adhesive to bond these in the three lowest groves in the van.


We then covered the floor with 100% coverage with the 10mm PE Van Foam Insulation Material.
We used spray contact adhesive to hold this inplace until the floor is placed down on top of this.

we utilised lead weights to assist with the bonding process.
After this.... we used DeciLAM and covered the whole surface using the existing floor as a template to assist us in cutting to size.


We fitted it in opposition the PE foam Insulation material to ensure no gaps met in both layers.

Last to do were the wheel arches. We cut a semicircle shape of ButylMAT to insulate the face of the wheel arch and then cut a strip to cover the top face of the wheel arches.
We are boxing the wheel arches in so we will also use the offcuts from the SIOPCELL foam van insulation that were left over from doing the roof.

We hope you enjoyed our van insulation guide.
This van insulation guide covers the insulation of a mercedes sprinter in its base form until it is converted to a premium campervan.

Please do not hesitate to contact us if you are converting a van to a camper as all the materials used here are OEM fit products and manufacted in the UK or Europe and available from our warehouse direct to your door.
Tel: 07513360708 or click the whatsapp link below.
Optional, for replies
No comments posted yet, check back soon.


